Help with sourdough bread

I've been experimenting with whole wheat sourdough bread for a few weeks now. My starter uses T110 wheat flour at 100% hydration, and bubbles nicely. I make the bread using:
- 1.5c T150 wheat flour, 1.5c T150 spelt flour
- 1/4c starter (also tried with 1/2c)
- 70% hydration (by mass) with bottled water
- about a Tbsp of honey
- about a Tbsp of olive oil
- about a tsp of salt
(I don't really want to use whiter flour for health reasons.) My goal is to have something as soft as a loaf of sliced bread from the store (it's just a goal, even if not really possible with what I'm using).
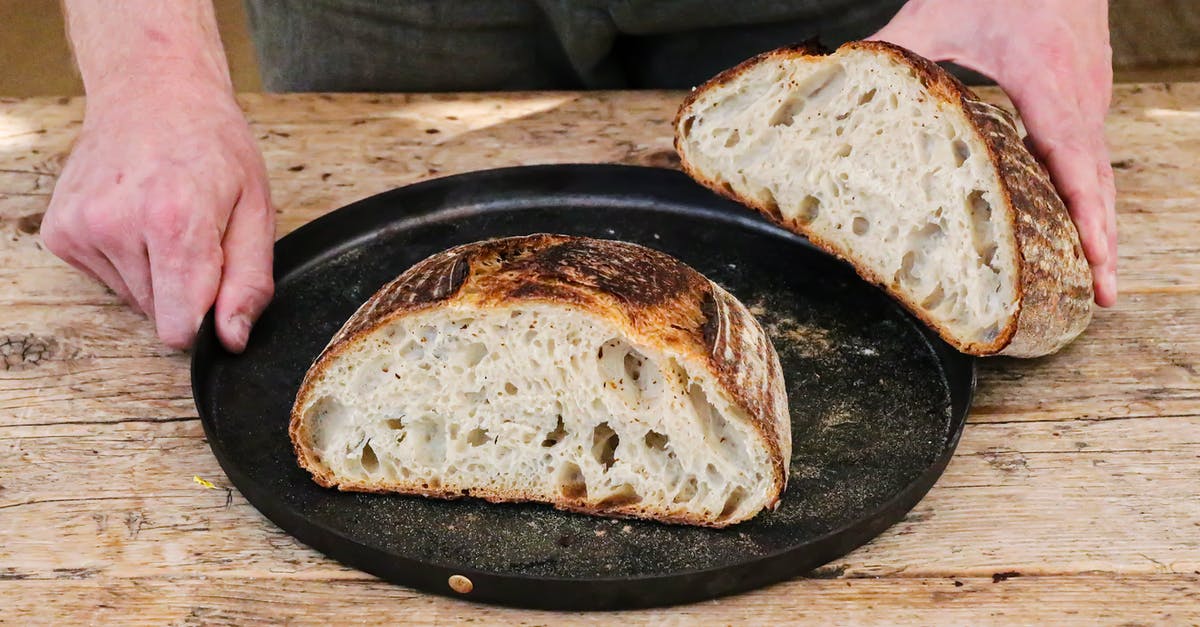
So far, all the loaves I've made have basically entailed mixing everything together at once, kneading, rising, then baking. The result is soft, but kind of dense, and a bit crumbly (in spite of my efforts to knead it more and more...). I suppose I'm overproofing it, too (I leave it sit out for about 10 hours, as it takes that long to finish rising, and when I put it in the oven I have to be gentle or it will deflate). I've read stuff saying that they let it rise 4 hours, but at that point I've only gained about 50% volume.
So, does anybody have any suggestions for how I can get my loaf to be softer, lighter, and less crumbly?
Best Answer
In my experience, the two things you can do to most improve the crumb of your bread are:
- Autolyse - Basically this means that once you combine your flour and water, let the dough sit for awhile (I usually autolyse for 20-30 minutes). This allows the flour to more completely absorb the water, and results in a more extensible dough. Some say that you should wait to add salt until after you autolyse, but I have seen no difference after trying it both ways.
- Take your time - An extended period of raising and proofing your dough almost always results in a better and more flavorful loaf. Don't hesitate to use your refrigerator during your first or second rise to delay the activity of the yeast. For sourdough, I prefer to use the fridge for my final, shaped proof. This has the additional benefit of some nice effects with the crust.
There are quite a few other factors that may be contributing to your difficulties. It sounds like your starter may not be active enough when you mix everything together. I would recommend more time feeding and preparing your starter before using it.
You might also benefit from some additional tricks and techniques. Using your list of ingredients, the method I would use to bake bread is as follows:
- Combine your flours and water (Yes, you may be autolysing for several hours, this is a good thing).
- Activate your sourdough starter.
- Combine your starter, the autolysed dough, salt, oil, and honey.
- Knead. (I use a stand mixer on medium and go until the dough pulls away from the sides. Be patient here and try to resist the temptation to add more flour at this step, unless you've kneaded for 10 minutes and seen no change, but then only add a tablespoon of so.)
- Place your dough in an oiled container (these are awesome). Put the container in a warm place until the dough has doubled.
- Once your dough has doubled, gently remove it from the container onto a lightly floured surface. Stretch and fold your dough (in thirds, like a letter). Then rotate and do it again. Gently return the dough to your container for a second rise.
- Let your dough rise until doubled again (I use a crayon to mark the side of my container so I know exactly where double should be). If your dough has been pretty active so far (if your first rise took less than an hour to double), I would do the second rise in the refrigerator.
- Gently remove the dough from your container, onto a lightly floured surface and gently shape your loaf. (One option is the batard.)
- Place the shaped loaf on a lightly greased cookie sheet, on a SilPain (I love mine thoroughly), or on a nice layer of cornmeal on your peel, ready to slide directly onto the stone. Cover the dough. (I use either loosely tented plastic wrap, or a clean dishtowel.)
- Turn on your oven. Set the temperature 10% higher than the recipe calls for.(I preheat my oven during all of final proofing, with my bread stone on the lowest rack so it will be nice and hot. If you haven't tried baking with a stone, I cannot recommend it too highly. The higher temperature is so your bread will have a nice initial spring in the oven.)
- When your loaf has nearly doubled in size, mist it with water and slash it several times. (If you did your final shaped rise in the refrigerator, you don't need to let it sit at room temperature before putting it the oven.)
- Get a cup full of ice cubes ready.
- Open your oven, place the loaf on the stone, and drop the ice cubes on the floor of your oven (If you care about water stains in the bottom of your oven, you can place a cookie sheet or cast-iron skillet in the bottom to catch the ice cubes. If you do, put it in the oven before preheating.) Quickly, but gently close the door.
- After 5 minutes, reduce your oven temperature to the normal baking temperature.
- After another 10 minutes, crack the oven door briefly to release the steam.
- A loaf like this will be done when the internal temperature reaches about 200?F.
- Remove the loaf to a cooling rack. Resist the temptation to immediately devour it, as the texture of the crumb and the tenderness of the crust will be adversely effected if you cut it before the loaf has cooled somewhat.
Some resources that have helped me in my bread baking:
- The Bread Bible
- King Arthur Flour
- Using a kitchen scale to measure by weight, rather than volume. (I understand the desire to throw a loaf together, eyeballing the ingredients, kneading with your hands. It seems as though something as organic as creating bread should be like that. Every time I have tried, my loaf has been inferior. I have been baking bread for 20 years and am sad to admit that if I want my bread to be amazing, I have to measure everything precisely and use a mixer.)
Pictures about "Help with sourdough bread"


How do I make sourdough bread better?
What is the secret to sourdough bread?
Sourdough differs from most bread in that it contains no baker's yeast, relying instead on a fermented \u201cstarter\u201d of water and flour to provide lift. This also provides its sour flavour and chewy texture.Why is my sourdough bread so dense and heavy?
Sourdough bread is often dense when a weak starter is used. An un-ripe starter doesn't have enough lactic acid bacteria and yeast cells to produce the gas required to raise the loaf. Another cause is the gluten structure may be undeveloped and can't stretch to retain the gas that's produced.Why does sourdough bread upset my stomach?
The most common reaction to fermented foods is a temporary increase in gas and bloating. This is the result of excess gas being produced after probiotics kill harmful gut bacteria and fungi.How To Make Sourdough Bread Masterclass
More answers regarding help with sourdough bread
Answer 2
Since spelt flour doesn't have much usable gluten, that will contribute to softness but not structure. That could be some of your crumbliness right there.
To get a bit more volume and some more structure, you could try doing a second rise. Let it rise until almost doubled, punch it down, fold it a couple of times, then mold it and let it rise again. This should give the dough more strength. You can also add a couple of teaspoons of vital wheat gluten per cup of flour to make the dough stronger.
Answer 3
From what you've said, I suppose you just put the starter in and let the loaf rise. While there are special kinds of bread that are made this way, it generally requires exact control over temperature (and ideally, moisture).
I'm not entirely sure if you actually are using the starter in the bread or if you've fed the starter already and are putting "actual" sourdough in the bread.
In any case, you are using too little sourdough in your recipe: If I read your recipe correctly, you're only using 8-16% sourdough in the bread. For wheat and spelt breads I'd recommend 30% sourdough. 50% for rye breads.
The reason that your bread is dense is that you have too little yeast in your dough. There can be several causes for this, so without an exact description of what you have done (what, when, how long, temperature), I can only guess at some of the most common ones:
- It's too cold. Yeast likes it around 25°C.
- You have too little sourdough in your bread dough (see above)
- You left the sourdough sitting without food for too long. Yeasts are the first microbes that die of starvation in sourdough
- It was too warm. Anything above 40°C will kill your yeasts.
You may also find some useful information on sourdough starters on my lengthy answer to another question here: sourdough starter
One additional note: fat, oil and salt will alter (usually slow) the fermentation in the sourdough. Only add them to the final bread dough or if that particular recipe actually requires you to do it.
Sources: Stack Exchange - This article follows the attribution requirements of Stack Exchange and is licensed under CC BY-SA 3.0.
Images: Cats Coming, Monserrat Soldú, Geraud pfeiffer, Alex Green
